
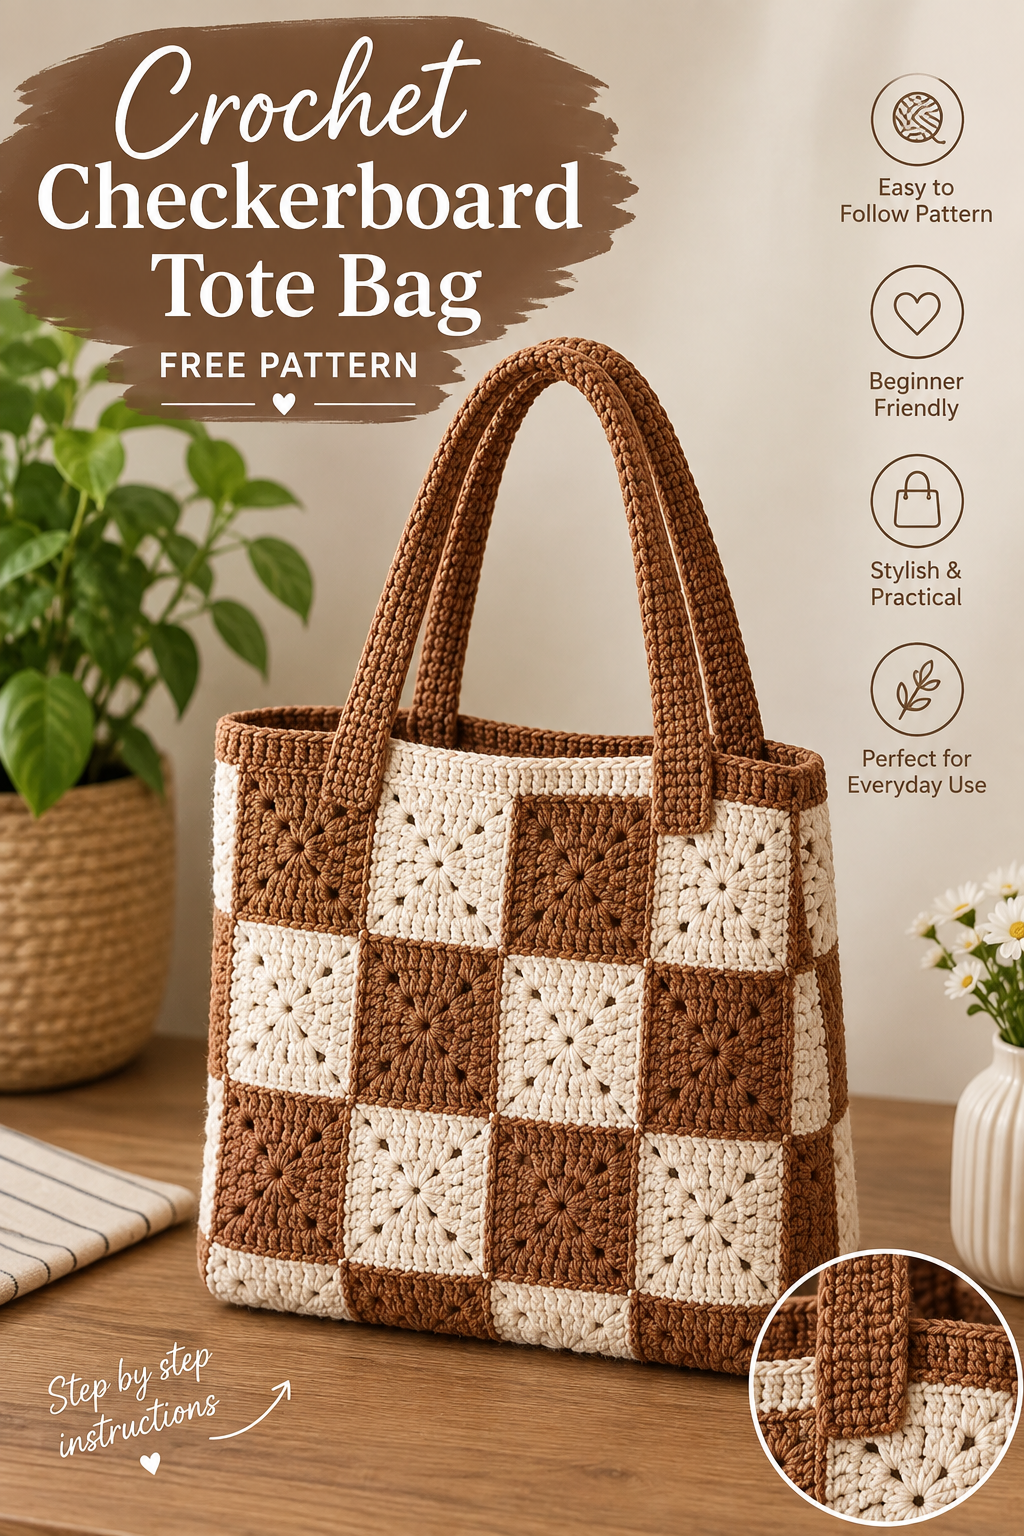
Create a beautiful, cozy crochet checkerboard granny square tote bag using classic granny squares in warm brown and creamy white. This stylish handmade bag is perfect for shopping, everyday use, the beach, or as a thoughtful handmade gift.
The alternating colors give this tote a vintage-inspired look while the sturdy construction makes it practical enough for everyday carrying.
Note: The pattern below is an original written pattern inspired by the uploaded photo. Since the photo does not show the exact original stitch instructions, yarn weight, or construction details, measurements can be adjusted to match your preferred size.
🧶 Materials
- Medium-weight cotton or cotton-blend yarn
- Brown yarn
- Cream/off-white yarn
- Crochet hook suitable for your yarn
- Yarn needle
- Scissors
- Stitch markers
- Measuring tape
Suggested Yarn
For a sturdy everyday tote, use approximately:
- Brown: 200–250 g
- Cream: 200–250 g
A cotton yarn is recommended because it holds its shape well and is durable.
📏 Finished Size
Approximately:
- Width: 35–38 cm
- Height: 35–40 cm
- Handle length: 45–50 cm
You can easily make the bag smaller or larger by changing the number of granny squares.
Crochet Abbreviations
- ch – chain
- sl st – slip stitch
- sc – single crochet
- dc – double crochet
- st – stitch
- sp – space
- rnd – round
Step 1: Make the Granny Squares
Make approximately 15 granny squares for the main body of the bag.
For the checkerboard effect, alternate the colors:
- Brown square
- Cream square
- Brown square
- Cream square
Basic Granny Square
Round 1
With your first color, make a magic ring.
Chain 3 (counts as 1 dc), then work:
2 dc, ch 2
Repeat:
3 dc, ch 2
three more times into the ring.
Join with a sl st to the top of the beginning chain-3.
You should have four groups of 3 dc.
Round 2
Slip stitch into the next corner space.
Chain 3, 2 dc, ch 2, 3 dc in the same corner.
Ch 1, 3 dc, ch 2, 3 dc in the next corner.
Repeat around.
Join with a slip stitch.
Round 3
Move to the next corner with slip stitches.
Chain 3, then work 2 dc, ch 2, 3 dc in the same corner.
Work 3 dc into each side space, with 3 dc, ch 2, 3 dc in every corner.
Join with a slip stitch.
Continue adding rounds until each square reaches approximately 10–12 cm.
Fasten off and weave in your ends.
Step 2: Create the Checkerboard Pattern
Arrange your squares on a flat surface before joining them.
A simple arrangement is:
Row 1: Brown – Cream – Brown – Cream – Brown
Row 2: Cream – Brown – Cream – Brown – Cream
Row 3: Brown – Cream – Brown – Cream – Brown
This creates the classic checkerboard appearance shown in the inspiration photo.
If you want a wider tote, add another column of squares.
Step 3: Join the Granny Squares
Place two squares together with the wrong sides facing each other.
Using brown yarn or cream yarn, join them with single crochet stitches through both layers.
Work carefully along the entire edge.
Repeat until all the squares are joined into the front and back panels.
Tip
For a more defined look, use a contrasting joining color. For a softer appearance, use yarn that matches the edges of the squares.
Step 4: Make the Bag Body
Once the front and back panels are complete, place them together with the right sides facing outward.
Join the sides and bottom using single crochet stitches.
Work slowly around the corners to keep the shape neat.
Leave the top edge open.
For extra strength, work 2–3 rounds of single crochet around the top opening.
This gives the bag a stronger and more finished rim.
Step 5: Crochet the Handles
The handles are one of the most important parts of this tote because they need to support the weight of the bag.
Using brown yarn:
Chain approximately 60–70 stitches, depending on the desired handle length.
Handle Row
Single crochet across the entire chain.
Chain 1 and turn.
Continue working single crochet rows until the handle is approximately 3–4 cm wide.
Fasten off and leave a long yarn tail.
Make a second identical handle.
Step 6: Attach the Handles
Position the handles evenly on both sides of the bag.
A good starting point is approximately 8–10 cm from each side seam.
Sew each handle securely to the inside and outside of the bag.
For extra durability, sew around the attachment area several times.
You can also add a small rectangular reinforcement using single crochet stitches.
Step 7: Add the Final Border
For a polished finish, work one or two rounds of single crochet around the top edge.
For the final round:
Ch 1, sc in each stitch around, sl st to join.
Fasten off and weave in all remaining ends.
✨ Finishing
Gently shape the bag with your hands.
If desired, lightly block the granny squares before assembling the bag. This helps create straight edges and gives the finished tote a cleaner shape.
Do not stretch the bag excessively, especially if using cotton yarn.
👜 Optional Bag Lining
For a stronger everyday tote, add a fabric lining.
Cut two pieces of cotton fabric slightly smaller than the finished bag.
Sew the pieces together around the sides and bottom, leaving the top open.
Insert the lining inside the crochet bag and hand-stitch it around the top edge.
A lining is especially useful if you plan to carry:
- Books
- Groceries
- Cosmetics
- Yarn projects
- Everyday essentials
🌸 Customization Ideas
This crochet tote is easy to personalize.
Try different color combinations such as:
- 🤎 Brown + Cream
- 🖤 Black + White
- 🌿 Sage + Cream
- 🌸 Pink + Cream
- 💙 Navy + Beige
- 🍂 Rust + Ivory
You can also make the squares larger for a modern oversized tote or smaller for a cute handbag.
💡 Crochet Tips
Keep your tension consistent.
Even tension will help all your granny squares stay the same size.
Count your stitches.
Small differences between squares can make joining difficult.
Weave in ends as you go.
This saves a lot of finishing work at the end.
Reinforce the handles.
The handles receive the most stress, so secure them firmly.
Use cotton yarn.
Cotton creates a sturdy fabric and is particularly suitable for tote bags.
Frequently Asked Questions
How many granny squares do I need?
For a tote similar to the pictured design, approximately 15 medium-sized granny squares can be used for the front and back panels. Adjust the number according to your desired bag size.
Can beginners make this bag?
Yes! If you know how to crochet basic granny squares, single crochet, double crochet, and slip stitches, this project is beginner-friendly.
What yarn is best for a crochet tote bag?
Cotton or cotton-blend yarn is an excellent choice because it is strong, washable, and less stretchy than many acrylic yarns.
Can I make the bag bigger?
Absolutely. Simply make larger granny squares or add additional squares to each panel.
🤎 Final Thoughts
This crochet checkerboard granny square tote bag combines classic crochet techniques with a beautiful modern color palette. The brown-and-cream squares create a warm handmade look, while the sturdy handles make the bag practical for everyday use.
It is a wonderful project for using your favorite yarn colors, practicing granny squares, and creating a handmade accessory that is both stylish and functional.
