
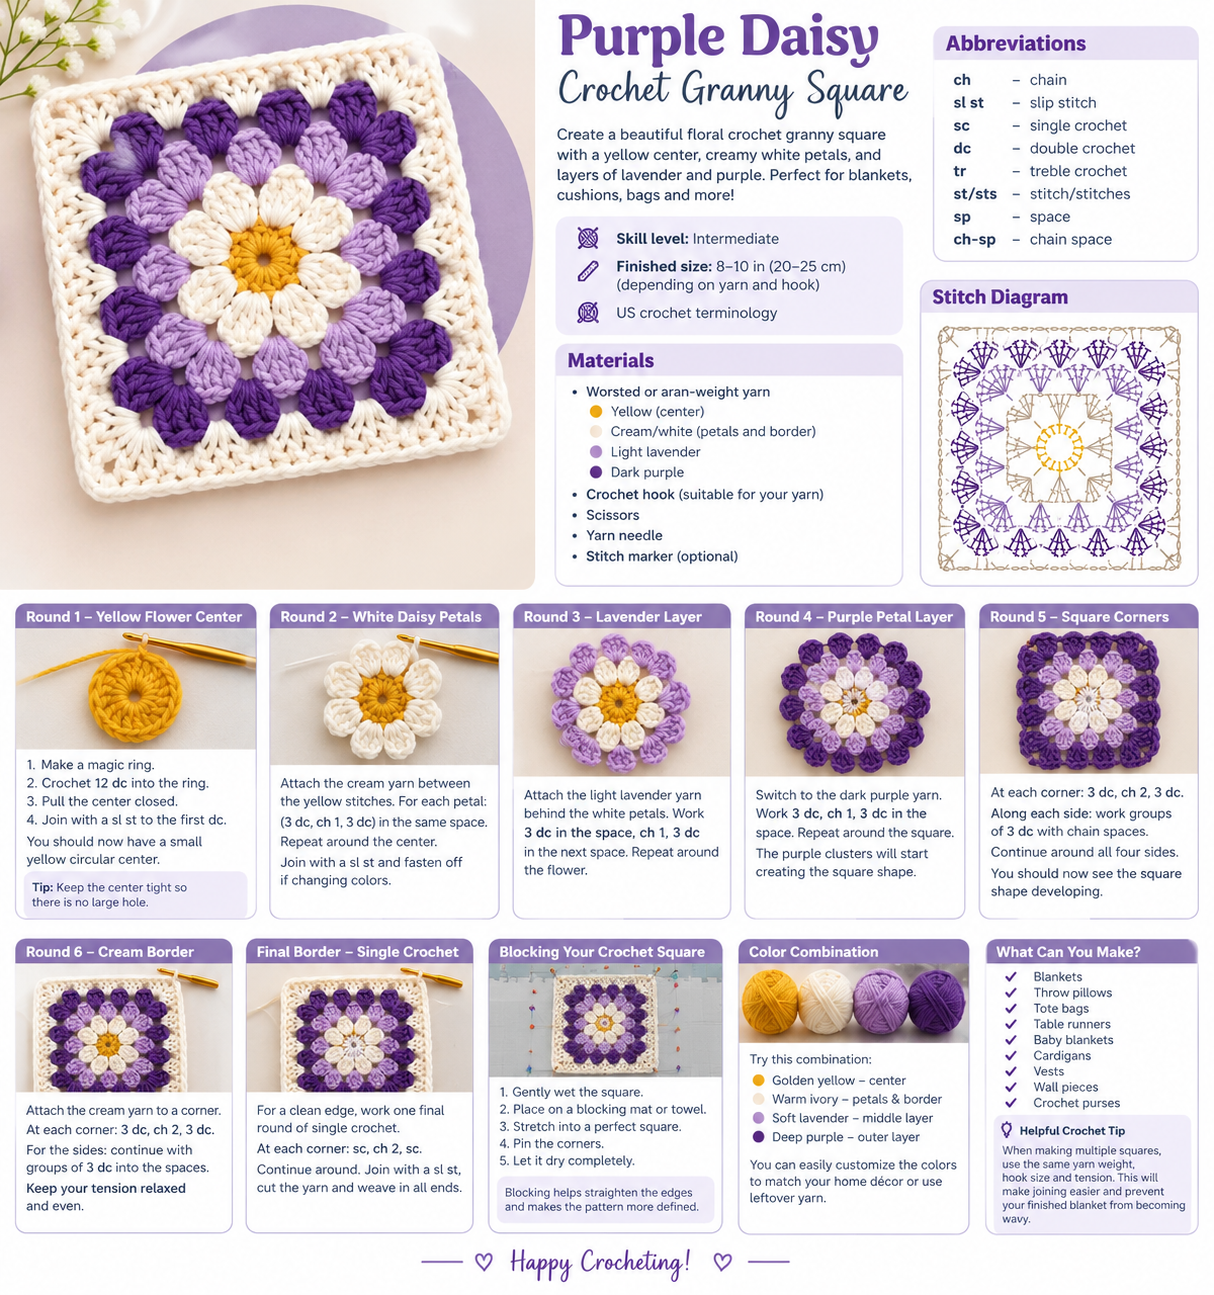
Create a beautiful floral crochet granny square featuring a cheerful yellow center, creamy white petals, and layers of lavender and purple flowers. This square is perfect for blankets, cushions, bags, cardigans, and other crochet projects.
Skill level: Intermediate
Finished size: Approximately 8–10 in (20–25 cm), depending on yarn and hook
US crochet terminology
Materials
- Worsted or aran-weight yarn
- Yellow for the flower center
- Cream/white for the petals and border
- Light lavender
- Dark purple
- Crochet hook suitable for your yarn
- Scissors
- Yarn needle
- Stitch marker, optional
Abbreviations
- ch – chain
- sl st – slip stitch
- sc – single crochet
- dc – double crochet
- tr – treble crochet
- st/sts – stitch/stitches
- sp – space
- ch-sp – chain space
Round 1 – Yellow Flower Center
- Make a magic ring.
- Crochet 12 dc into the ring.
- Pull the center closed.
- Join with a sl st to the first dc.
You should now have a small yellow circular center.
Tip: Keep the center tight so there is no large hole in the middle of your flower.
Round 2 – White Daisy Petals
Attach the cream yarn between the yellow stitches.
For each petal:
- Work a cluster of tall stitches into the same space.
- Separate the petals with a small chain space.
- Repeat around the entire center.
A simple petal can be made with:
(3 dc, ch 1, 3 dc) in the same space.
Continue until you have a full ring of white petals.
Join with a slip stitch and fasten off if changing colors.
Round 3 – Lavender Flower Layer
Attach the light lavender yarn behind the white petals.
Work groups of stitches around the flower to create the second floral layer.
A useful repeat is:
3 dc in the space, ch 1, 3 dc in the next space.
Continue around the flower.
As you work this round, gently shape the clusters so the lavender sections sit between the white petals.
Round 4 – Purple Petal Layer
Switch to the dark purple yarn.
Work larger clusters around the outside of the lavender round.
For each group:
3 dc, ch 1, 3 dc in the designated space.
Repeat around the square.
The purple clusters should begin creating the four-sided shape of the granny square rather than remaining completely circular.
Round 5 – Creating the Square Corners
This is the important shaping round.
At each corner, work:
3 dc, ch 2, 3 dc
into the corner space.
Along each side, work groups of:
3 dc
with chain spaces between the groups as needed.
Continue around all four sides.
You should now clearly see the square shape developing.
Round 6 – Cream Border
Attach the cream yarn to one of the corners.
At each corner, work:
3 dc, ch 2, 3 dc
For the sides, continue working granny-style clusters of 3 dc into the spaces.
Keep your tension relaxed and even so the square stays flat.
Final Border
For a clean finished edge, work one final round of single crochet.
At each corner:
sc, ch 2, sc
in the corner space.
Continue around the entire square.
Join with a slip stitch, cut the yarn, and pull through.
Weave in all ends using a yarn needle.
Blocking Your Crochet Square
For the neatest result, lightly block the finished square.
- Gently wet the crochet piece.
- Place it on a blocking mat or clean towel.
- Stretch it carefully into a perfect square.
- Pin the four corners.
- Allow it to dry completely.
Blocking will help straighten the edges and make the floral pattern much more defined.
Color Combination
For a look similar to the pictured design, try:
- 🌼 Golden yellow – center
- 🤍 Warm ivory – petals and border
- 💜 Soft lavender – middle layer
- 🟣 Deep purple – outer flower layer
You can easily customize the colors to match your home décor or use leftover yarn.
What Can You Make With This Square?
Make several squares and join them together to create:
- Crochet blankets
- Throw pillows
- Tote bags
- Table runners
- Baby blankets
- Cardigans
- Vests
- Decorative wall pieces
- Crochet purses
Helpful Crochet Tip
When making multiple squares, try to keep the same yarn weight, hook size, and tension for every square. This will make joining them much easier and will prevent your finished blanket from becoming wavy.
Note: The stitch diagram in the photo is a visual guide, so the exact stitch counts may vary depending on yarn weight, tension, and hook size. The written pattern above is a crochet interpretation designed to recreate the same floral granny-square style.
